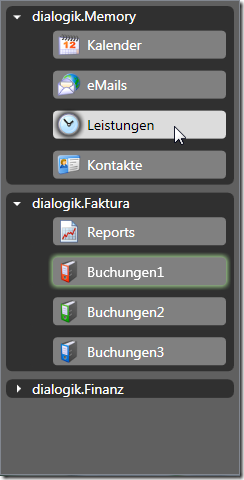
I’ve posted an update for my WPF TreeView which contains a bugfix and two new features:
- The root item collection is now monitored for changes, and the tree updates itself automatically. This behaviour, however, can be controlled through the ObserveRootItems dependency property.
- Built-in filtering support through a strongly typed predicate. I’m not completely happy with my implementation though – as a matter of fact, I’ve already started to rewrite it completely – you can expect the next version within the next 10 days. The filtering API however, will remain intact.
In case you did override some of the tree’s virtual methods, your project might not compile out of the box because some of these methods now receive additional parameters. However, as nothing has been removed, adjusting your code should be a matter of seconds.
I’ve added the download link to the original post:
http://www.hardcodet.net/2008/01/wpf-treeview
Happy coding 🙂
Automatic properties in .NET 3.5 are a nice thing, but they are out of the equation if you want to take advantage of the almighty INotifyPropertyChanged interface which plays a crucial role in WPF. Here’s a set of ReSharper snippets that simplify interface implementation and property declaration.
Event Declaration
The first snippet just prints out an interface implementation and adds some additional value to it, including a runtime check of property names in Debug builds (credits go to Josh Smith for this one). Just type inpc to print out this statement:
#region INotifyPropertyChanged event

///<summary>
///Occurs when a property value changes.
///</summary>
public event PropertyChangedEventHandler PropertyChanged;


/// <summary>
/// Raises the <see cref="PropertyChanged"/> event for
/// a given property.
/// </summary>
/// <param name="propertyName">The name of the changed property.</param>
protected void OnPropertyChanged(string propertyName)
{
  //validate the property name in debug builds
  VerifyProperty(propertyName);

  if (PropertyChanged != null)
  {
    PropertyChanged(this, new PropertyChangedEventArgs(propertyName));
  }
}


/// <summary>
/// Verifies whether the current class provides a property with a given
/// name. This method is only invoked in debug builds, and results in
/// a runtime exception if the <see cref="OnPropertyChanged"/> method
/// is being invoked with an invalid property name. This may happen if
/// a property's name was changed but not the parameter of the property's
/// invocation of <see cref="OnPropertyChanged"/>.
/// </summary>
/// <param name="propertyName">The name of the changed property.</param>
[Conditional("DEBUG")]
private void VerifyProperty(string propertyName)
{
  Type type = this.GetType();

  //look for a *public* property with the specified name
  PropertyInfo pi = type.GetProperty(propertyName);
  if (pi == null)
  {
    //there is no matching property - notify the developer
    string msg = "OnPropertyChanged was invoked with invalid property name {0}: ";
    msg += "{0} is not a public property of {1}.";
    msg = String.Format(msg, propertyName, type.FullName);
    Debug.Fail(msg);
  }
}

#endregion
…and don’t forget to declare the INotifyPropertyChanged implementation. The snippet won’t do that for you:
public class Class1 : INotifyPropertyChanged
Property Declaration
The second snippet (shortcut is pcp) simplifies the declaration of a given property for you. You can define property name, type, default value and a description summary. The generated code for a sample property looks like this:
#region UserId

/// <summary>
/// The numeric ID of the user. Defaults to null.
/// </summary>
private int? userId = null;


/// <summary>
/// The numeric ID of the user. Defaults to null.
/// </summary>
public int? UserId
{
  get { return userId; }
  set
  {
    //ignore if values are equal
    if (value == userId) return;

    userId = value;
    OnPropertyChanged("UserId");
  }
}

#endregion
Grab the snippet here: Download
Agreed – the WPF learning curve is steep, but once one figures out how the basics work, things tend to get amazingly easy. And of course, the emerging sets of toolkits dont’t hurt either.
Here’s another sample – a customer of mine needed a utility to maintain data in their web shop (MySql) and update the shop database based on external data. Here’s the result of about 1.5 days work, starting pretty much from scratch (click on thumbnail for the screenshot):

And once more, I have to say: LLBLGen ist a wonderful tool – setting up database mappings is a breeze, and the generated entities play very nice with WPF. Kudos to Frans Bourma for this one!

This is a pretty simple user control, which allows you to display a file dialog to open or save files. Its look can be easily adjusted, and it provides built-in truncation of the file string to a predefined length if necessary. Here’s the XAML for the above sample control:
<files:FileSelector x:Name="openFileSelector"
                    Mode="Open"
                    MaxDisplayLength="50"
                    Height="24"
                    Width="400" />
The TextBlock in the screenshot which displays the full file path was simply bound to the control’s FileName dependency property:
<TextBlock Text="{Binding ElementName=openFileSelector, Path=FileName}" />
The control does not provide too many extension or styling points – the idea is that you just copy it into your solution, adjust the styling of the control’s contents (Border, Button etc.) and be on your way. The source comes with a small sample project – enjoy 🙂
Download Control
Just saw that Blendables have extended their portfolio of WPF controls. The stuff looks good, but unfortunately, their licensing scheme doesn’t:
A license is required for each machine utilizing the blendables controls. […] As we do not offer a deactivation method, if you must reactivate on a new developer machine you are allowed up to 3 activations. This is for the case of re-imaging or setting up a new developer machine. Once this limit is reached you must contact blendables support at […] to proceed with activation.
I must say, not purchasing their product is a no-brainer…
If you have a WPF TreeView control that shows nested data, and you don’t want the user to select nodes that contain child nodes, you can solve this declaratively as TreeViewItem provides all we need:
- HasItems dependency property (bool)
- Focusable dependency property (bool)
As both properties have the same type, you can use a binding expression (needs inversion of the boolean), or just use a trigger. Here’s the trigger:
<!-- root items can only be expanded, not selected -->
<Trigger Property="HasItems"
         Value="true">
  <Setter Property="Focusable"
          Value="false" />
</Trigger>
 With this trigger in place, simply clicking on a node that contains child items does not change the tree’s current selection, while expanding/collapsing still works.
A common scenario for such a behavior is a tree that contains nodes which are used for grouping purposes only as in the example screenshot.


 With this trigger in place, simply clicking on a node that contains child items does not change the tree’s current selection, while expanding/collapsing still works.
